The Beginner’s Guide to Parental Controls
A plain-English starting point for parents who have never set up any of this: the three layers that matter, what each one can't do, and where to begin.
 By GuestSpy Editor · Founder and editorPublished September 10, 2026Updated September 14, 202610 min read
You have decided to set up parental controls and you are staring at a phone with no idea where to actually begin. Screen Time, Family Link, router settings, a dozen apps in the app store all claiming to be essential — it is a lot of noise for what is, underneath it, a fairly simple job.
This guide is the one to read first, before any of the others. It will not walk you through every menu on every platform — that is what our iOS and Android setup guides are for. Instead it explains the shape of the problem: the three layers that make up “parental controls”, what each one can and cannot do, which one to set up first, and the mistakes that waste a beginner’s first weekend. By the end you should know exactly what to open next.
The three layers of parental controls
Almost every confusing product decision in this space comes from treating “parental controls” as one thing. It is not. It is three separate systems, each solving a different problem, and each with a hole the others happen to fill.
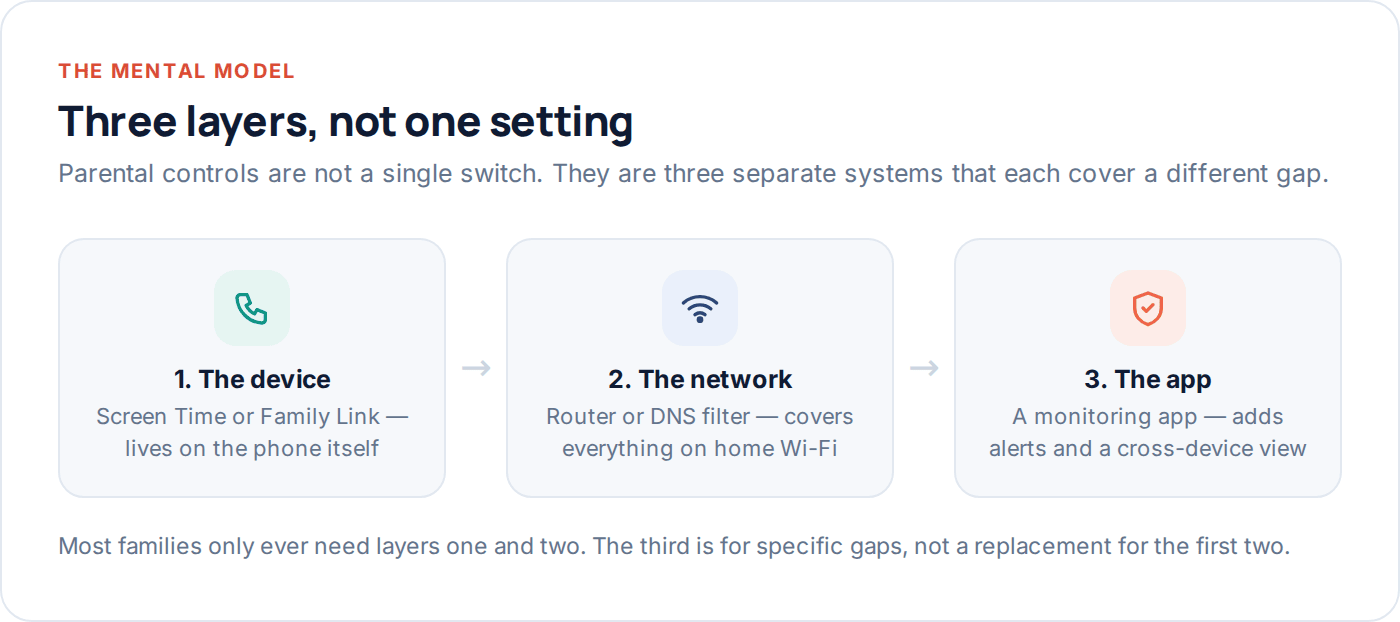
Layer one lives on the device itself — Screen Time on an iPhone, Family Link on an Android phone. It is free, it is already installed, and it is where almost everyone should start. Layer two lives on your home network — your router, or a DNS-based filter — and it covers every device in the house, including the ones that do not run apps at all, like a games console or a smart TV. Layer three is a dedicated monitoring app, which exists to answer questions the first two layers were never built to answer, like “did they arrive at school” or “who is calling this number repeatedly”.
Layer one: the device itself
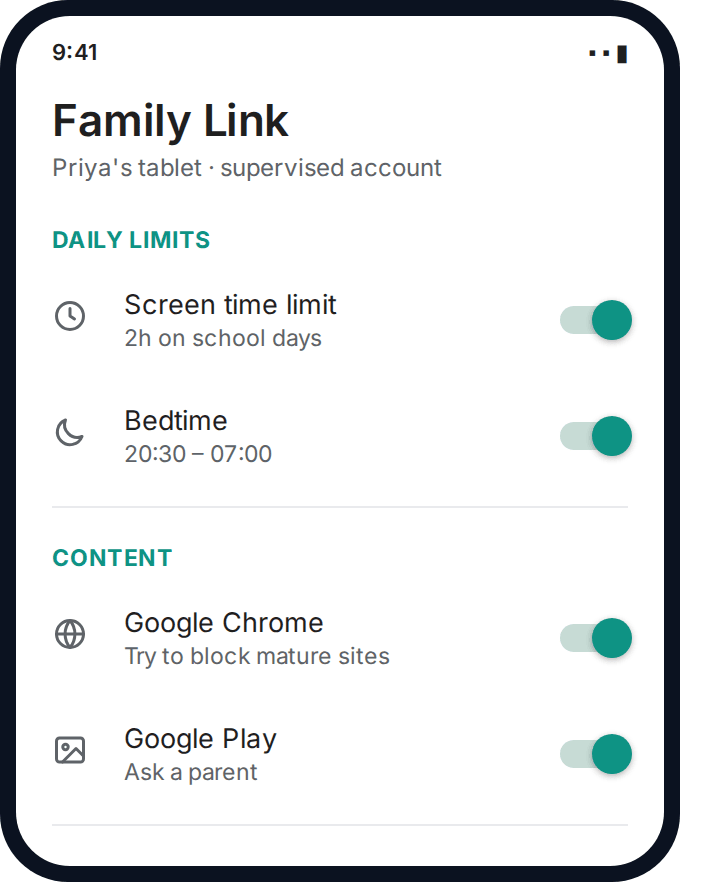
This is the operating system’s own parental controls, and it is the right place to start for almost every family, at almost every age. On an iPhone it is Screen Time, buried in Settings. On an Android phone or tablet it is Google Family Link, a separate companion app you install on your own phone and pair with theirs.
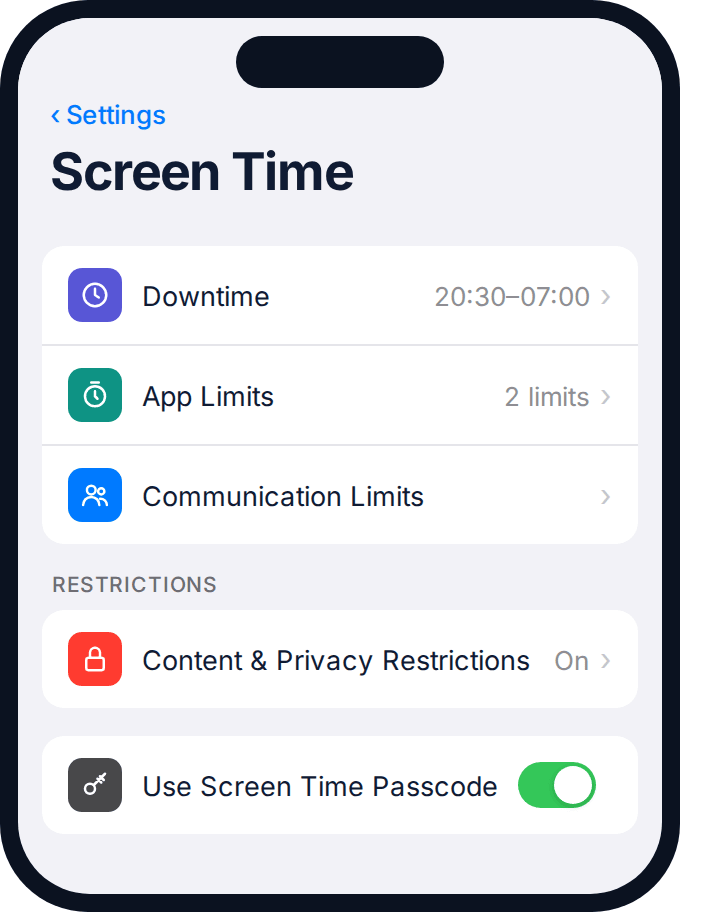
Both do broadly the same four jobs: they set a bedtime window when the phone locks itself down, they cap how long specific apps or categories of app can be used each day, they filter obviously adult web content, and they require your approval before certain purchases or app installs go through. None of this needs a subscription. None of it needs you to install anything extra on your own phone beyond, on Android, the free Family Link app.
What it does not do is follow the child anywhere the device settings can be reset — a factory reset wipes it, a determined teenager who knows the passcode can turn it off, and it has nothing to say about who is calling or texting your child. It is a strong, free floor. It is not a ceiling.
Which platform guide to read next
If your child has an iPhone, our Apple Screen Time walkthrough covers every setting in order with screenshots. If they have an Android phone or tablet, the equivalent Google Family Link walkthrough does the same. Both take about ten minutes once you know where to look.
Layer two: your home network
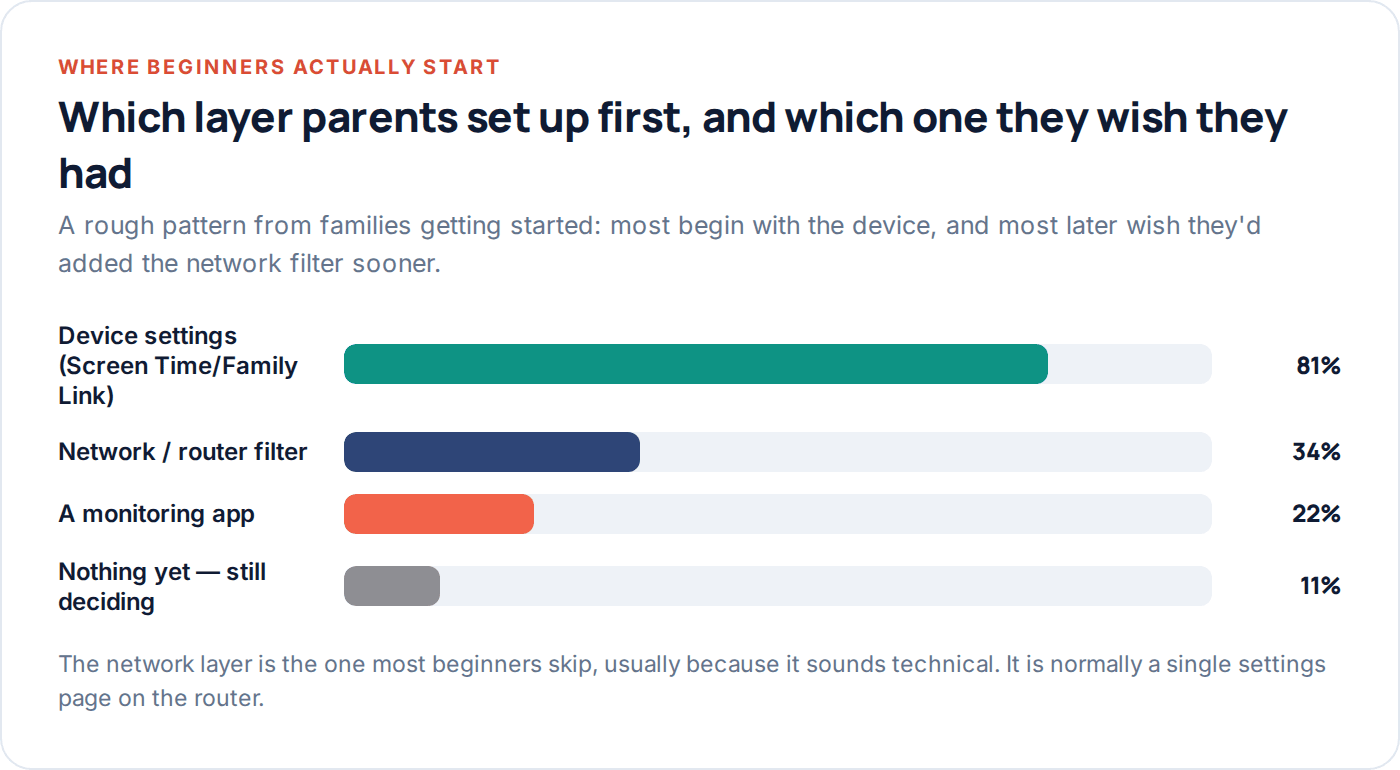
This is the layer most beginners skip, usually because “router settings” sounds more technical than it is. In practice it is one settings page, reached by typing your router’s address into a browser, or a free DNS filtering service that takes about five minutes to switch on for the whole house.
Its superpower is that it does not care what device is asking. A smart TV, a games console signed into no account at all, a laptop, a tablet nobody thought to set up individually — if it is on your home Wi-Fi, the filter applies. That makes it the single best layer for younger children who share devices or use ones that cannot run apps of their own.
What it covers
Every device on your home Wi-Fi, without installing anything on each one individually. Great for shared and non-phone devices.
What it misses
Mobile data, any other Wi-Fi network — school, a friend’s house, a café. Once the device leaves your house, this layer stops working.
Who it suits best
Households with young children, shared family devices, or a smart TV and console that need covering without buying separate tools for each.
Set it once, and unless you change routers it mostly stays out of your way. It is the layer beginners most often regret not setting up sooner, precisely because it is the one that felt too fiddly to start.
Layer three: a monitoring app
This is where a product like GuestSpy sits, and it is deliberately the last layer, not the first. It exists to answer a specific set of questions the other two layers were never designed for: where is this phone right now, did it arrive somewhere it was expected to, who has been calling or texting, and should I know about a particular word appearing in a message.
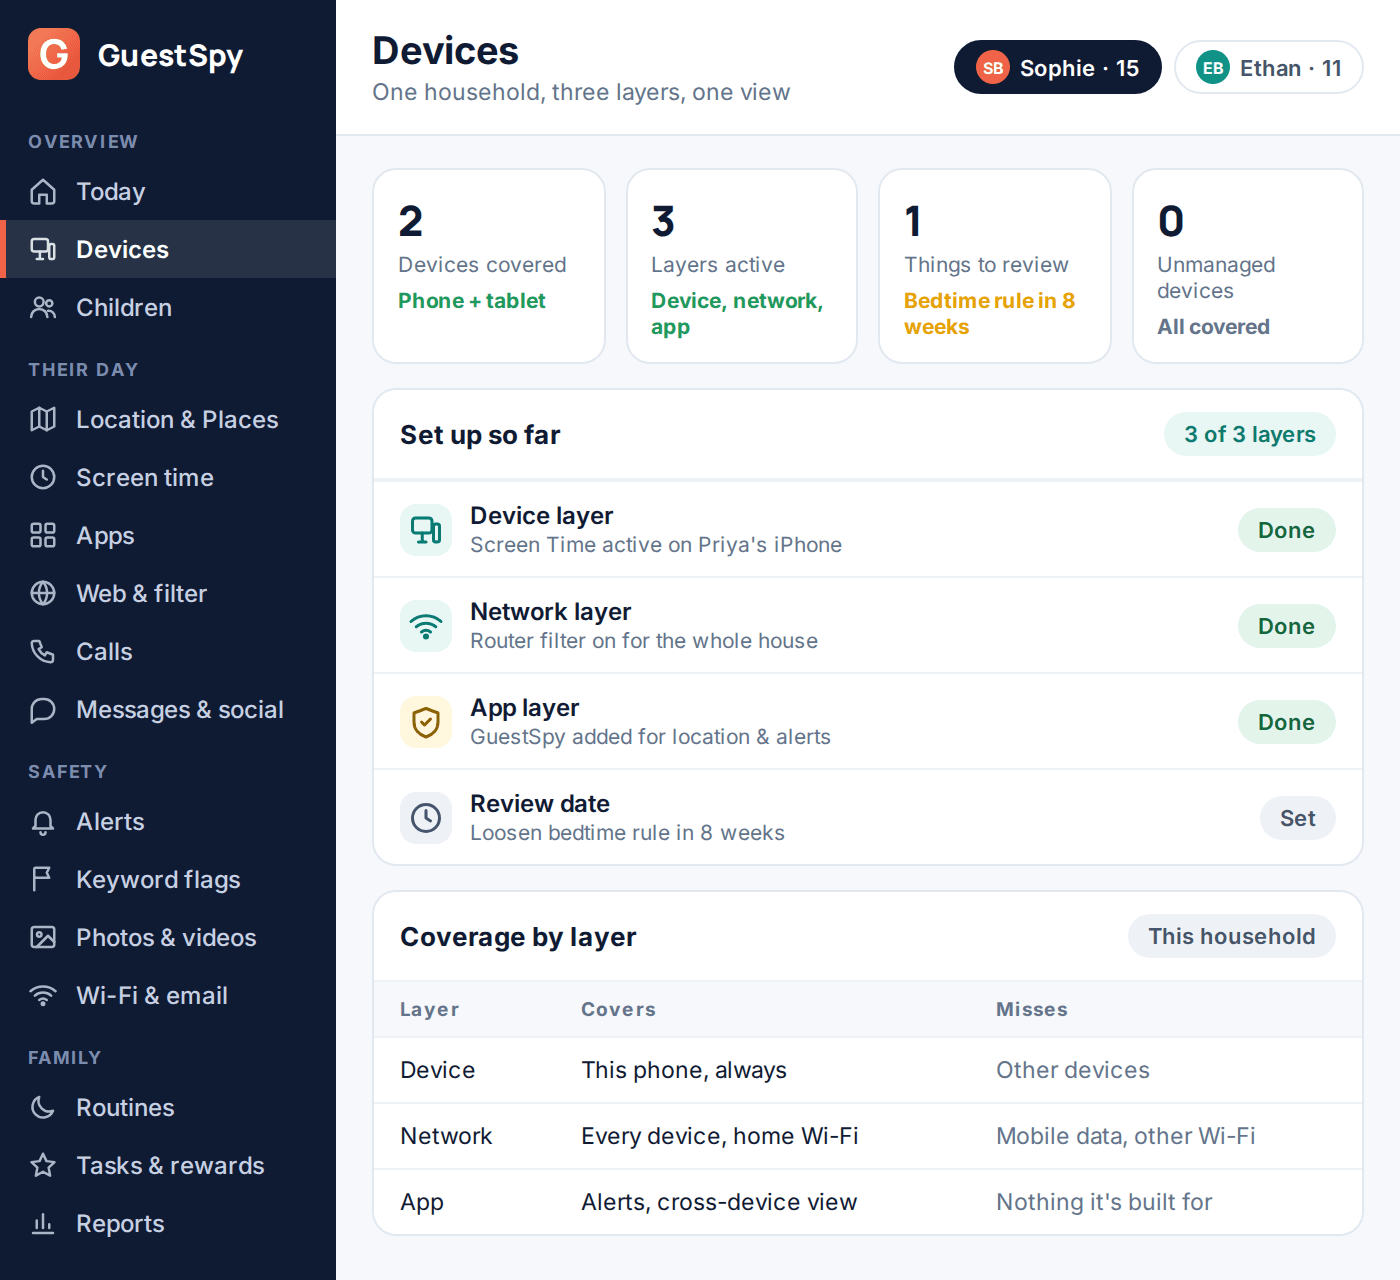
A monitoring app is not a replacement for the device or network layer — it is additive, and it works alongside them. It also needs the same honesty the other layers do: on GuestSpy, the app is visible on the child’s phone with a screen explaining exactly what is shared, because a tool a child does not know about teaches them to route around every other rule you set too.
The mistake beginners make here is reaching for layer three first, because it is the one that gets marketed hardest. Layers one and two are free, already on the device, and solve most of what a new parent is actually worried about — bedtime, screen time, accidental content. Save the app layer for the specific gap it fills.
What each layer can and can’t do
Laid out side by side, the gaps each layer leaves become obvious, and so does why most families eventually use some combination of all three rather than relying on just one.
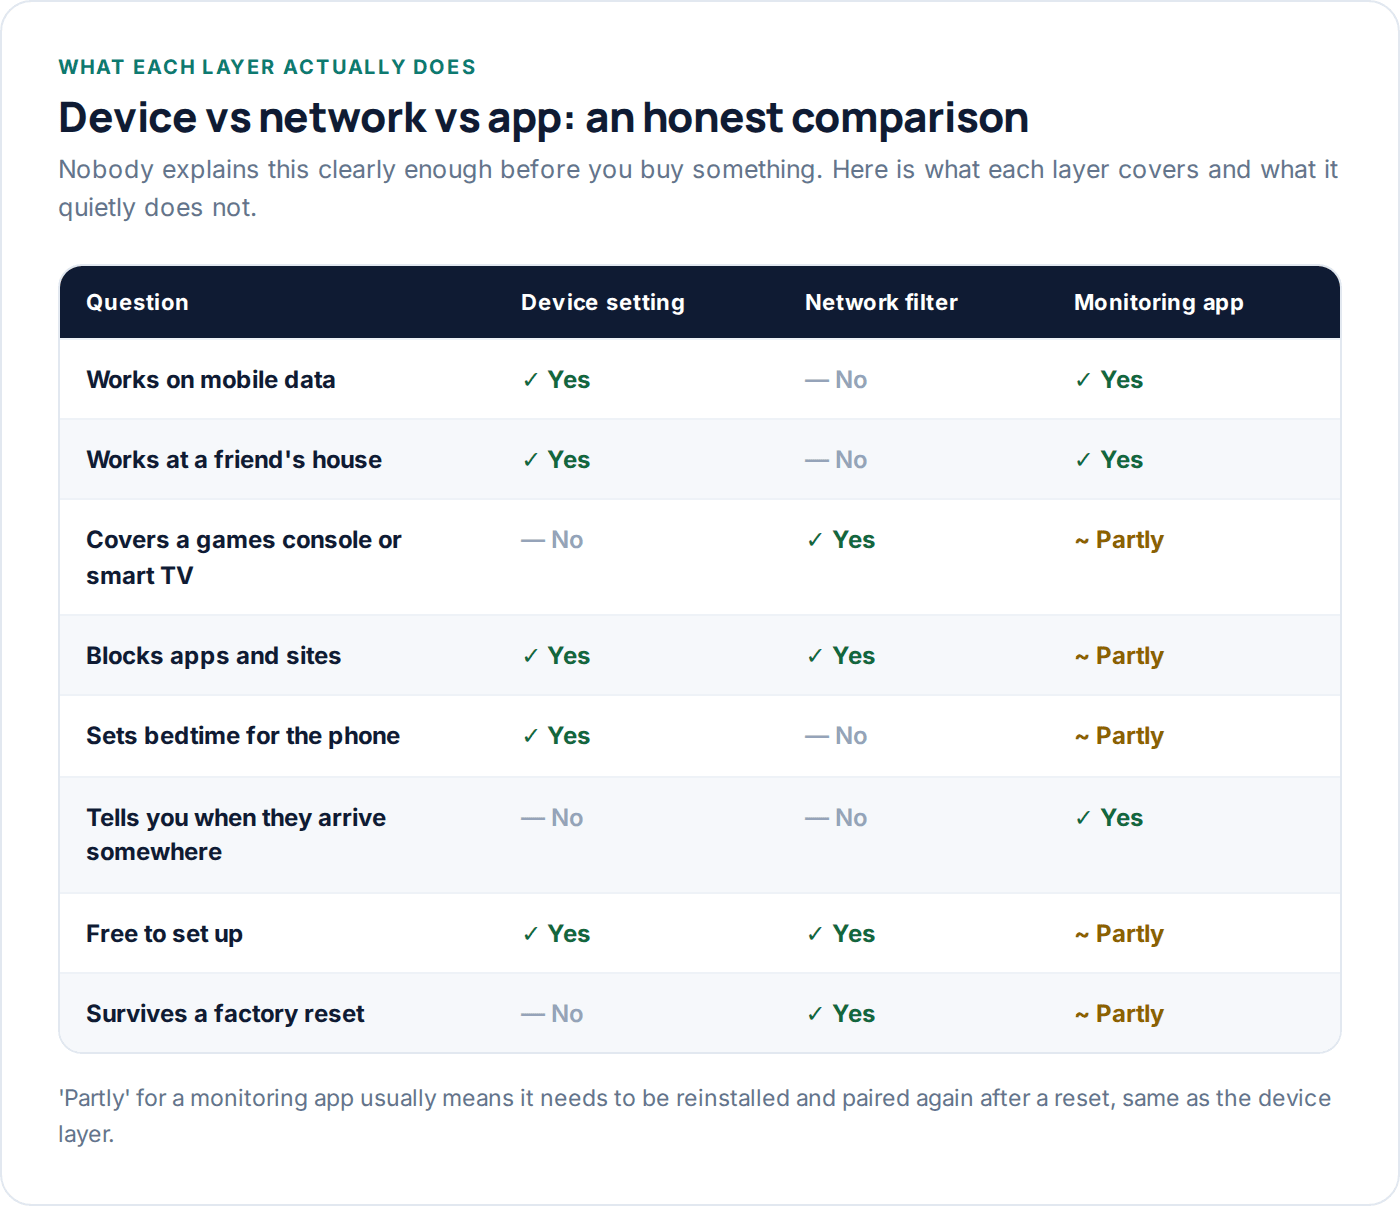
Read that table as a planning tool, not a shopping list. If your only worry is bedtime and homework time, the device layer alone probably solves it. If you also have a nine-year-old who shares a family tablet and a games console in the living room, add the network layer. Only add the app layer once you have a specific, named question the first two cannot answer.
Where to actually start this week
Here is the order that saves the most time for the least effort, based on what actually needs to happen versus what merely feels urgent.
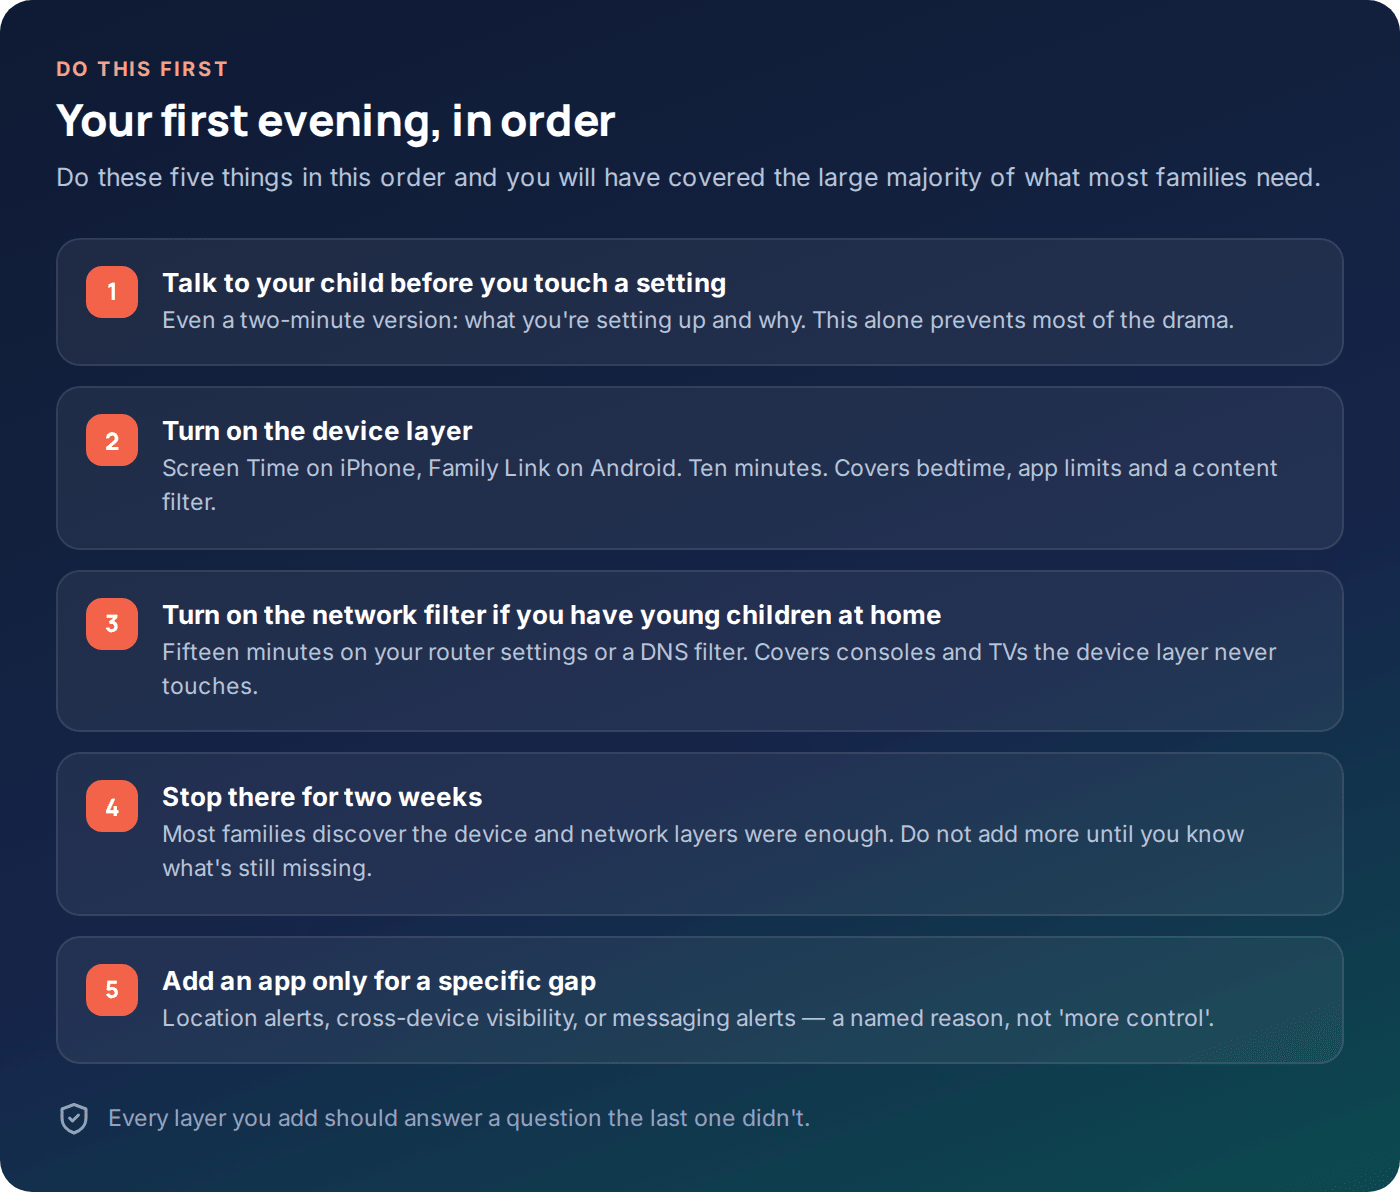
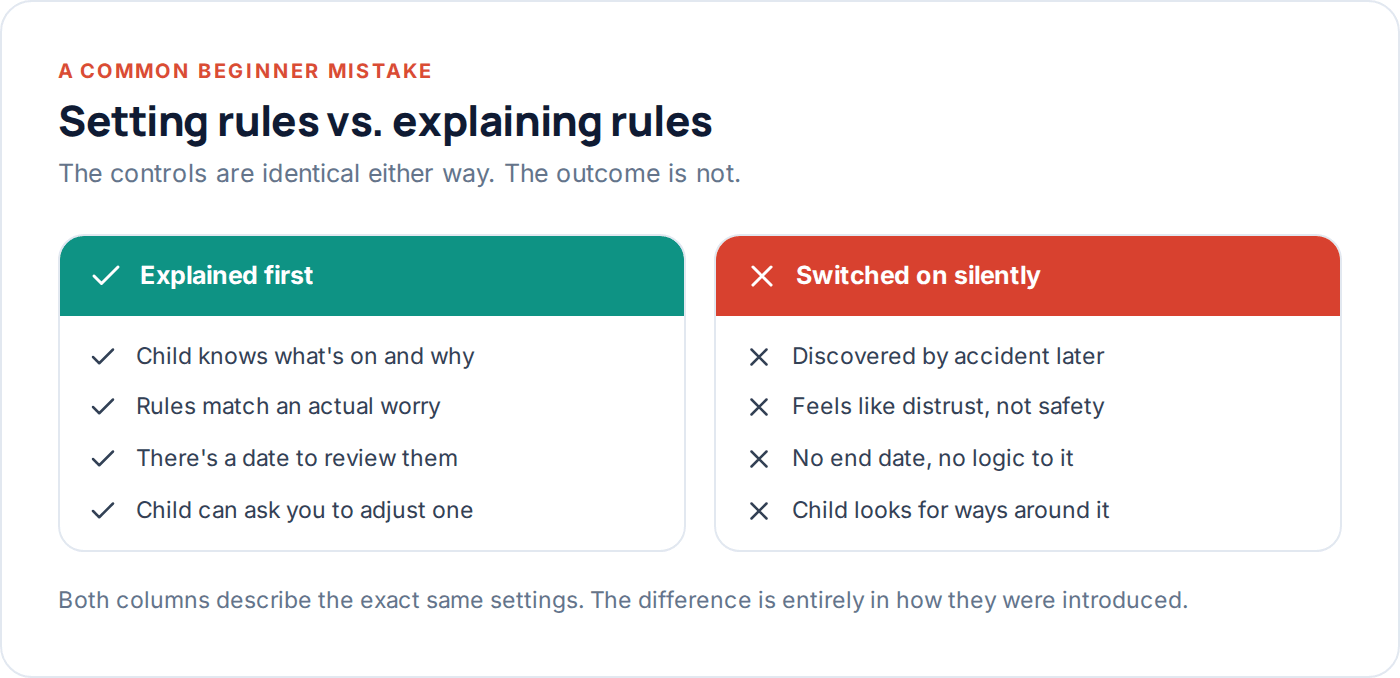
- Have the conversation first. Two minutes, plain language: “I’m setting up some limits on your phone, here’s roughly what they do.” This one step prevents most of the friction that follows.
- Turn on the device layer today. It takes ten minutes, it is free, and it covers bedtime, app time limits and basic content filtering immediately.
- Add the network layer this week if you have younger children or shared devices. Fifteen minutes on the router. Skip it if your household is mostly older teenagers on personal phones — the device layer alone will do most of the work.
- Live with it for two weeks before adding anything else. Most families discover the first two layers cover the actual problem, not the imagined one.
- Add an app only for a named gap. “I want to know when she gets to her grandmother’s” is a reason. “I want more control” is not — it is a feeling, and it will not tell you what setting to turn on.
Common mistakes beginners make
A handful of patterns show up again and again in families setting this up for the first time, and most of them are easy to avoid once you know to look for them.
Setting the limits without saying anything. It always gets discovered — a locked app, a blocked site, a notification that gives it away — and discovering a rule by accident reads very differently to a child than being told about it in advance.
Copying a stranger’s settings instead of your own family’s. A downtime window built for a seven-year-old is far too tight for a fifteen-year-old, and vice versa. Set the numbers to match the child in front of you, not a generic template.
Treating three layers as three separate projects. They are meant to work together. A network filter that blocks a site does nothing if the same site is fine over mobile data — that is not a failure of the network filter, it is simply outside its job.
Never reviewing anything. A bedtime setting that was right at nine is often wrong at thirteen. Put a date in your calendar, even a rough one, to revisit what you set up today.
Matching layers to your family
There is no single correct setup — the right combination depends on the ages in the house and how the devices are actually used day to day.
| Household | Start with | Add if needed |
|---|---|---|
| Young children, shared tablet/console | Network filter first — it covers shared devices without setting each one up individually. | Device layer once they have a device of their own. |
| One child, one phone, ages 8–12 | Device layer (Screen Time / Family Link) — covers almost everything at this age. | App layer only if location or a specific worry comes up. |
| Teenager, own phone, ages 13–15 | Device layer for bedtime and app limits, kept light. | App layer for location and message alerts if the device layer feels too limited. |
| Multiple children, different ages | Device layer per child, network layer for the house. | App layer for a single view across everyone, rather than checking each child’s phone separately. |
| Older teen, 16–17 | Very light — device layer mostly off, occasional check-in. | Location sharing only, and usually as a mutual arrangement rather than a rule. |
For a more detailed breakdown of what is reasonable at each specific age, our guide to screen time by age goes further than the household-level view above.
Questions people actually ask
Do I need to buy anything to get started?
No. The device layer — Screen Time on iPhone or Family Link on Android — is free and already available. Most families can cover their main concerns with that alone, plus a free or low-cost network filter if they have young children sharing devices.
What’s the very first thing I should turn on?
The device layer, on the specific phone or tablet in front of you. It takes about ten minutes, needs no extra hardware, and covers bedtime, app time limits and basic content filtering immediately.
Is a monitoring app necessary?
Not for most families, and not as a first step. It earns its place when the device and network layers leave a specific gap — usually location, or knowing who is contacting your child — rather than as a general upgrade.
My child is a teenager — is it too late to start?
No, but the approach changes. With a teenager, lead with the conversation more than the settings, keep the rules lighter than you would for a younger child, and expect to negotiate some of it. Heavy-handed controls introduced late tend to backfire.
How much time should this actually take?
The device layer is about ten minutes. A network filter is another fifteen. If you stop there, which most families do for at least the first month, you are looking at well under an hour total.
What if my child knows how to get around the settings?
Some will, especially teenagers who are more comfortable with the phone than you are. That is a reason to keep the conversation going, not a reason to add more layers. A rule a child understands and considers fair is far more durable than one they are actively trying to defeat.
Your next step
Pick the device your child uses most, set aside ten minutes, and start with the device layer. If you need the exact steps, go to our Apple Screen Time or Google Family Link walkthrough next — both are written for someone doing this for the very first time. Everything else in this guide can wait until you know what, specifically, is still missing.
If you eventually decide you need the third layer, see what GuestSpy covers and set it up when you have a real, specific gap to fill — not before.
Using a monitoring app for this? GuestSpy is parental monitoring for Android that stays visible on the child's phone and runs from any browser. If it fits your family, see what the app does.
Related guides
How to Talk to Your Kid About Screen Time
The conversation decides whether a screen time rule holds or gets fought over daily. Scripts by age, how to involve…
How to Block Adult Websites on Every Device at Home
No single setting blocks adult content everywhere. Here's the layer-by-layer setup — device, DNS, router, browser, console and TV —…
How to Set App Time Limits That Actually Stick
Category limits beat per-app limits, warnings beat sudden cut-offs, and a limit set without a conversation gets bypassed within a…
Monitoring your child can see.
Location, screen-time budgets, routines, app and website blocking and the alerts that matter, run from any browser and visible on the phone. Pair an Android phone in about fifteen minutes.